How to Start a Blog in 2026 (Beginner-Friendly Guide)
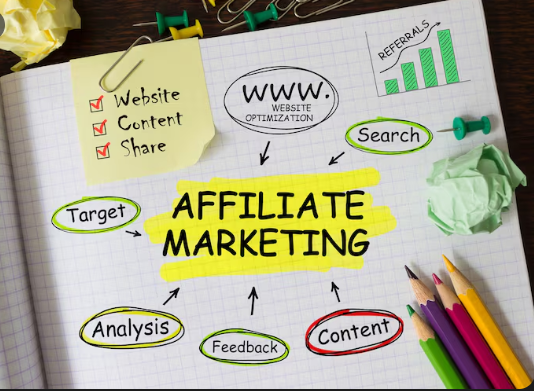
Everyone says blogging is dead. They’re wrong. Yeah, it’s harder than it was in 2015, but people are still building real income from blogs in 2026; you just need to know what actually works now. I’ve started (and failed at) multiple blogs. This time, I’m doing it differently. Here’s the exact beginner-friendly roadmap I’m following to finally make this work. No confusing tech jargon, no fluff; just the clear steps you need to go from zero to your first published post.
What You’ll Learn in This Guide
By the end of this post, you’ll know exactly how to:
- Pick a profitable blog niche and domain name
- Choose the right hosting (without overspending)
- Install WordPress in minutes
- Set up your theme and essential plugins
- Write blog posts that actually rank on Google
- Drive traffic to your new blog
- Start making money from day one
No tech degree required. Just follow the steps.
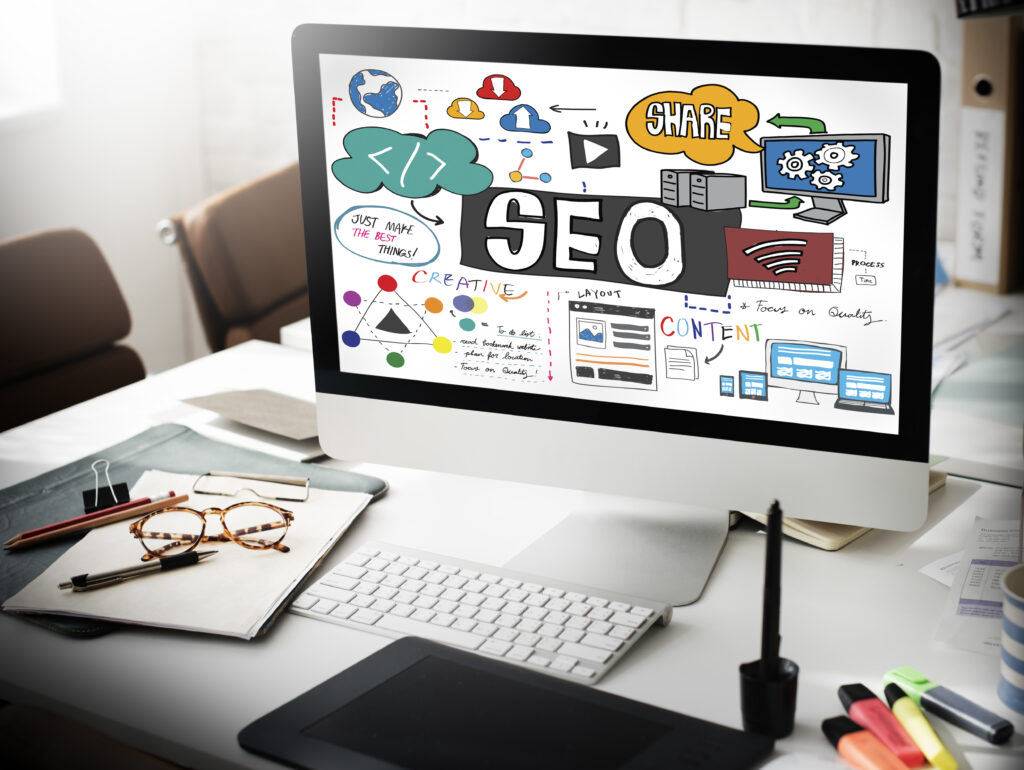
Why WordPress in 2026?
Look, you have options when starting a blog: Wix, Squarespace, Medium, whatever. But here’s why WordPress is still the smartest choice in 2026:
You own everything. Your content, your data, your design – it’s all yours. Platforms like Medium can change their rules overnight. WordPress? You’re in control.
It’s free and flexible. The software itself costs nothing. You can customize it endlessly with themes and plugins. Want to add a membership site later? A course platform? An online store? WordPress handles it all.
It powers 40%+ of the web. That means constant updates, massive community support, and thousands of developers making plugins and themes. If you have a problem, someone’s already solved it.
It’s built for SEO. Google loves WordPress sites when they’re set up right. The platform is designed to help you rank, which means more free traffic.
WordPress released multiple updates in 2025 and continues rolling out improvements in 2026. It’s not going anywhere.

Step 1: Pick Your Niche and Domain Name
Choose Your Niche (What You’ll Write About)
Your niche is your blog’s focus. Don’t try to write about everything; it never works. Pick one clear topic you can talk about consistently.
Good niches solve a specific problem or teach something valuable:
- Budget travel tips for solo travelers
- Easy meal prep for busy parents
- WordPress tutorials for beginners
- Home workouts for people with no equipment
- Side hustle ideas for 9-to-5ers
My advice? Pick something you’re interested in AND that people actually search for. Use Google; type in your topic and see what autocomplete suggests. Those are real searches from real people.
Start narrow. You can always expand later. But trying to cover “health and fitness and travel and finance” from day one? That’s how blogs die.
Pick Your Domain Name
Your domain is your blog’s address (like theincomeplug.com). Here’s how to choose a good one:
- ✅ Keep it short – Aim for 2-3 words
- ✅ Make it memorable – Can someone remember it after hearing it once?
- ✅ Easy to spell – No weird spellings or hyphens
- ✅ Related to your niche – Helps people instantly know what you’re about
If your perfect name is taken, try adding a word like “the,” “get,” “my,” or “hub.” For example: TheBudgetTraveler, GetFitFast, MyHomeWorkouts.
Should you use .com? Ideally, yes. But .co, .net, or .blog work fine too if .com is taken. Just avoid weird extensions like .xyz or .biz – they look spammy.
Where to buy your domain: Namecheap, Hostinger, or GoDaddy. Most hosting companies also throw in a free domain for the first year when you sign up (more on that next).
Domains cost around $10-$20 per year.
Step 2: Choose Web Hosting (Where Your Blog Lives)
Hosting is the service that stores your website files and makes your blog accessible online. Think of it like renting space on the internet.
Here’s the simple breakdown:
Shared Hosting – The Budget Option
- Cost: $2-$10/month
- Best for: Brand new bloggers
- Pros: Cheap, easy to use
- Cons: Slower when you get traffic spikes
- Examples: Hostinger, Bluehost, Namecheap
Managed WordPress Hosting – The Hands-Off Option
- Cost: $15-$50/month
- Best for: Bloggers who want speed and don’t want to deal with tech stuff
- Pros: Faster, automatic backups, better security, they handle updates
- Cons: More expensive
- Examples: WP Engine, Kinsta, Cloudways
VPS/Cloud Hosting – The Advanced Option
- Cost: $20-$100+/month
- Best for: Tech-savvy bloggers or high-traffic sites
- Pros: Maximum control and performance
- Cons: Requires technical knowledge
My recommendation for beginners? Start with shared hosting from Hostinger or Bluehost. It’s cheap, includes a free domain, and has one-click WordPress installation. You can always upgrade later when you’re making money.
If you’ve got a bigger budget and want faster performance from day one, go with managed hosting like WP Engine. Your site will load faster, rank better, and you won’t have to worry about backups or security.
[Insert your affiliate link here for Hostinger or Bluehost]
Step 3: Set Up Hosting and Install WordPress
Good news – installing WordPress is way easier than it used to be. Most hosts have a “one-click install” button that does everything for you. Here’s the process:
1. Sign up for your hosting plan
Go to your chosen host (Hostinger, Bluehost, etc.) and pick a plan. The basic shared hosting plan is fine for beginners – usually around $2–$5/month when you pay for a year upfront.
During signup, you’ll be asked if you want a domain. If you haven’t bought one yet, grab it here – most hosts throw in a free domain for the first year.
2. Connect your domain (if you bought it separately)
If you already own a domain from somewhere like Namecheap, you’ll need to point it to your new hosting account. Don’t worry, it sounds technical but it’s simple:
- Your host will give you “nameservers” (looks like ns1.yourhost.com and ns2.yourhost.com)
- Log into your domain registrar (where you bought the domain)
- Find the DNS or nameserver settings
- Paste in the nameservers your host gave you
- Save it
This can take up to 24 hours to work, but it’s usually done in an hour or two.
3. Install WordPress with one click
Once your hosting is set up:
- Log into your hosting dashboard (cPanel or whatever interface they use)
- Look for “Install WordPress” or “WordPress Installer”
- Click it and fill in a few simple fields:
- Site title (you can change this later)
- Admin username (don’t use “admin” – pick something unique)
- Admin password (make it strong)
- Admin email (use a real email you check)
Click install, wait 30 seconds, and boom – you have a WordPress site.
4. Log in to your WordPress dashboard
Go to yourdomain.com/wp-admin and log in with the username and password you just created.
Welcome to your WordPress dashboard. This is where the magic happens.
Step 4: Choose a Theme and Design Your Site
Your theme controls how your site looks. There are thousands of free themes and thousands more premium (paid) themes. Don’t overthink this; you can always change it later.
Best free themes for beginners in 2026:
- Blocksy – Fast, flexible, works great with page builders
- Astra – Super lightweight and customizable
- Kadence – Beautiful designs, easy to use
- Neve – Clean and modern
All of these are fast, SEO-friendly, and beginner-friendly. Pick one that looks good to you and move on. You can tweak it later.
Should you buy a premium theme?
Not necessary when you’re starting out. But if you want a more polished look with pre-made demo sites you can import, premium themes can save you time. Just know that a good free theme + some customization can look just as professional.
Page Builders: Gutenberg vs Elementor
You have two main options for building pages:
Gutenberg (WordPress Block Editor)
- Built into WordPress (no plugin needed)
- Lightweight and fast
- Getting better every year
- Great for simple, clean designs
- Best for: Bloggers who want speed and simplicity
Elementor (Drag-and-Drop Page Builder)
- Plugin you install
- Tons of widgets and templates
- Drag-and-drop everything
- More design control
- Best for: People who want custom layouts without coding
My take? If you’re just blogging (mostly text posts), stick with Gutenberg. If you want fancy landing pages and custom designs, go with Elementor.
I use Kadence+ Elementor on The Income Plug. It’s fast, clean, and I don’t need a heavy page builder slowing things down.
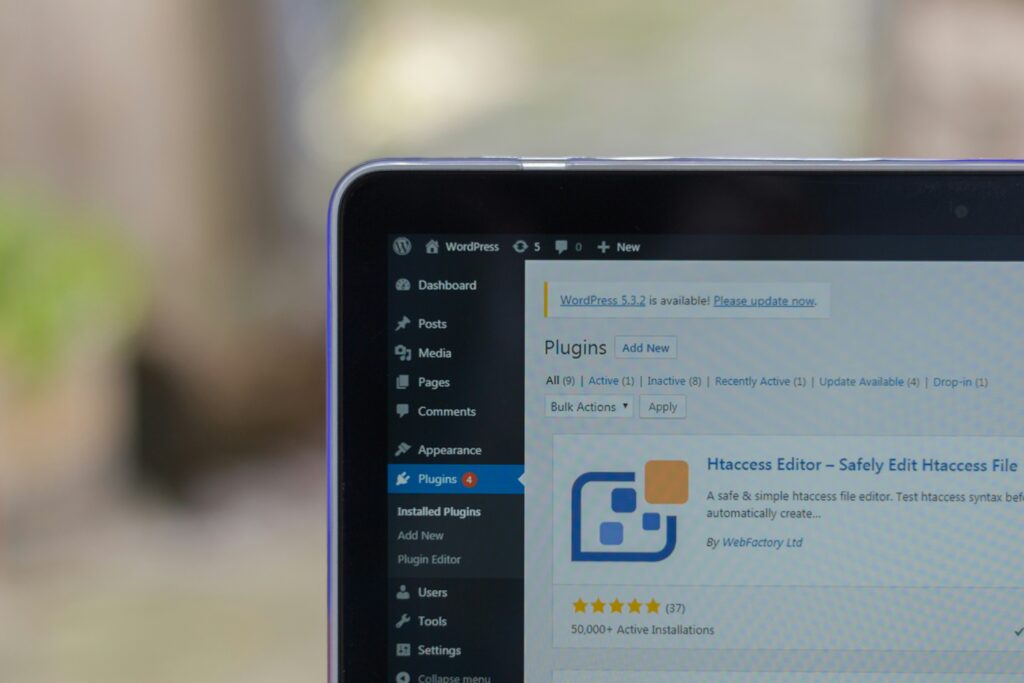
Step 5: Install Essential Plugins (Don't Go Crazy)
Plugins add features to your blog. But here’s the thing – too many plugins will slow down your site. Only install what you actually need.
Here are the 7 must-have plugins for a new blog:
1. SEO Plugin
- Options: Rank Math or Yoast SEO
- Why: Helps you optimize posts for Google (titles, meta descriptions, sitemaps, schema)
- My pick: Rank Math (free version has more features)
2. Caching/Speed Plugin
- Options: WP Rocket (paid, $59/year) or free alternatives like LiteSpeed Cache
- Why: Makes your site load faster (critical for SEO and user experience)
- My pick: WP Rocket if you can afford it, otherwise LiteSpeed Cache
3. Security Plugin
- Options: Wordfence or Sucuri
- Why: Protects against hackers, brute force attacks, malware
- My pick: Wordfence (free version is solid)
4. Backup Plugin
- Options: UpdraftPlus
- Why: Automatically backs up your site to Google Drive or Dropbox
- My pick: UpdraftPlus (free, easy to use)
5. Image Optimization
- Options: ShortPixel or Smush
- Why: Compresses images so pages load faster
- My pick: ShortPixel (free tier is generous)
6. Contact Form
- Options: WPForms or Contact Form 7
- Why: So people can reach you
- My pick: WPForms (easier to use)
7. Spam Control
- Options: Akismet
- Why: Blocks spam comments automatically
- My pick: Akismet (comes pre-installed with WordPress, just activate it)
After installing, test your site speed with Google PageSpeed Insights or GTmetrix. Aim for a score above 80.
Note: Security plugins are essential. I’ve tested and compared the 5 best WordPress security plugins; install one of these before you publish.
Step 6: Change These WordPress Settings Right Now
Before you start writing, fix these basic settings:
Permalinks (THIS IS IMPORTANT)
- Go to Settings → Permalinks
- Choose “Post name”
- This makes your URLs clean:
yourblog.com/how-to-start-a-bloginstead ofyourblog.com/?p=123 - Click Save
General Settings
- Go to Settings → General
- Set your Site Title and Tagline (what your blog is about)
- Make sure your timezone is correct
Reading Settings
- Go to Settings → Reading
- Choose whether your homepage shows latest posts or a static page
- (Most blogs just show latest posts)
Discussion Settings
- Go to Settings → Discussion
- Decide if you want to approve comments manually or let them post automatically
- I recommend manual approval at first to avoid spam
Enable SSL (HTTPS)
- Most hosts give you a free SSL certificate
- Go to your hosting dashboard and turn on SSL
- Then install the “Really Simple SSL” plugin to force HTTPS on your entire site
- Green padlock = good for SEO and trust
“Struggling with writer’s block? Here’s how to use ChatGPT for blogging to write better content fast
Step 7: Plan Your Content (What to Write First)
Alright, your blog is set up. Now comes the most important part – actually creating content.
Start with these essential pages:
1. About Page Tell people who you are and why you started this blog. Keep it real. Share your story. People connect with humans, not faceless blogs.
2. Contact Page Add a simple contact form so readers can reach you. You’ll need this for brand partnerships and collaborations later.
3. Privacy Policy Required if you’re collecting emails or using ads. Use a free generator like Termly or PrivacyPolicies.com.
4. Affiliate Disclosure (if you plan to use affiliate links) Be transparent. A simple statement like “This site contains affiliate links, which means I may earn a commission if you make a purchase” is enough.
Your First 8-12 Blog Posts
Don’t publish your blog with zero content. Write at least 8-12 solid posts before you start promoting. Here’s why: when someone lands on your site, they need to see you’re legit, not a brand new blog with 2 posts.
Post ideas to start with:
- Beginner’s guide to [your niche] – Comprehensive overview
- Top 10 mistakes new [niche people] make – Saves readers from common pitfalls
- How to [solve specific problem] in 5 steps – Actionable tutorial
- My story: Why I started this blog – Builds connection
- Best [tools/products] for [your niche] – Great for affiliate links
- [Niche] for beginners: What I wish I knew – Relatable and helpful
- [Comparison post]: X vs Y – Ranks well, answers real questions
- Quick tips to improve [specific outcome] – Easy wins for readers
Create a simple content calendar
Use a Google Sheet to plan:
- Post title
- Target keyword
- Publish date
- Status (draft, written, published)
Post 2-3 times per week if you can. Once a week minimum. Consistency beats perfection.
Step 8: Write SEO-Friendly Posts (Without Overthinking It)
SEO sounds intimidating, but it’s really just about helping Google understand what your post is about so it can show it to people searching for that topic.
Here’s the simple formula I follow for every post:
1. Pick ONE main keyword per post
Don’t try to rank for 10 different things in one post. Pick one main keyword and optimize for that.
How to find your keyword:
- Think about what someone would type into Google to find your post
- Use tools like Ubersuggest or just Google itself (more on this in Step 9)
- Example keywords: “how to start a blog 2026,” “best WordPress hosting for beginners,” “SEO tips for new bloggers”
Where to use your keyword:
- Post title (H1)
- URL/permalink
- First paragraph (first 100 words)
- At least one H2 heading
- Naturally throughout the post (don’t stuff it – just use it where it makes sense)
- Meta description
2. Write like a human, not a robot
Google’s algorithm is smart enough now to understand natural language. You don’t need to write “best WordPress hosting best WordPress hosting” 47 times.
Write for humans first. If it sounds natural and helpful, Google will like it too.
Tips:
- Short sentences are easier to read
- Use simple words (don’t say “utilize” when you mean “use”)
- Break up long paragraphs (2-4 sentences max)
- Use contractions (you’re, don’t, it’s)
3. Structure your post with headings
Use H2 for main sections and H3 for subsections. This makes your post scannable – most people skim before they read.
Good heading structure:
H1: How to Start a Blog in 2026
  H2: Why WordPress?
  H2: Step 1: Pick Your Niche
    H3: How to Choose a Profitable Niche
    H3: Examples of Good Niches
  H2: Step 2: Choose Hosting
4. Add images with alt text
Images break up text and make posts more engaging. Plus, they can rank in Google Image search.
Alt text is the description of the image. It helps:
- Visually impaired readers (screen readers read the alt text)
- Google understand what the image is about
- Your SEO (include your keyword if it makes sense)
Example: Bad alt text: “image1.jpg” Good alt text: “WordPress dashboard showing how to install plugins”
5. Link to your other posts (internal linking)
This is HUGE for SEO and most beginners ignore it.
When you write a new post, link to 2-3 related posts on your blog. And go back to old posts and add links to your new post.
Example: If you’re writing about WordPress plugins, link to your post about choosing hosting. If you’re writing about SEO, link to your post about keyword research.
Internal linking tells Google:
- Which pages are most important
- How your content is related
- That your site has depth (not just random posts)
6. Optimize your meta title and description
This is what shows up in Google search results. Your SEO plugin (Rank Math or Yoast) makes this easy.
Meta Title:
- Keep it under 60 characters
- Include your keyword
- Make it clickable
Meta Description:
- Keep it 150-160 characters
- Include your keyword
- Tell people what they’ll learn
Example: Title: “How to Start a Blog in 2026 (Beginner-Friendly Guide)” Description: “Learn how to start a profitable blog in 2026. Step-by-step guide covering WordPress setup, hosting, SEO, and monetization. No tech skills needed.”
“Want to speed up your SEO research? These AI SEO tools that can help you rank faster are worth checking out.”
7. Focus on being helpful, not hitting word counts
Yes, longer posts (1500-2500 words) tend to rank better. But a 800-word post that perfectly answers someone’s question will beat a fluffy 3000-word post that rambles.
Ask yourself, “Does this actually help the reader, or am I just adding words?”
Your SEO plugin will give you a checklist as you write. Green checkmarks = good. Don’t stress if everything isn’t perfect; just hit most of the important points.
Install one of these WordPress SEO plugins I’ve tested and recommend to optimize your content as you write.
Step 9: Find Topics That Actually Rank (Keyword Research Made Simple)
You could write 100 blog posts, but if no one’s searching for those topics, you’ll get zero traffic. That’s where keyword research comes in.
Don’t worry; you don’t need expensive tools. Here’s how to find keywords that can actually rank:
Free Keyword Research Methods
1. Google Autocomplete Start typing your topic into Google and see what it suggests. These are real searches from real people.
Example: Type “how to start a blog…” and Google shows:
- how to start a blog and make money
- how to start a blog for free
- how to start a blog on WordPress
Each of these is a potential blog post.
2. Google’s “People Also Ask” Box Search any topic and scroll down to the “People Also Ask” section. Click the questions to expand more. These are gold; actual questions people want answered.
3. Google Trends Go to trends.google.com and compare search terms. See what’s trending up vs dying out.
4. Your Competition Find blogs in your niche that rank well. Look at their most popular posts (check their “Popular Posts” sidebar or use a tool like Ubersuggest to see their top pages). Write similar (but better) content.
Paid Tools (Cheap or Free Trials)
- Ubersuggest: $12/month or free limited version
- Keywords Everywhere: Browser extension, about $10 for 100,000 credits
- AnswerThePublic: Free limited searches per day
What to Look For in a Good Keyword
- ✅ Search volume: At least 100-500 searches per month (you can rank for lower, but higher is better)
- ✅ Low competition: Look for keywords that aren’t dominated by huge sites
- ✅ Long-tail keywords: “How to start a food blog in 2026” is easier to rank than just “start blog.”
- ✅ Search intent: Make sure people searching this keyword want what you’re offering
Pro tip: Start with long-tail keywords (3-5 words). They’re easier to rank for when you’re new. As your blog grows, you can target shorter, more competitive keywords.

Step 10: Images, Branding, and Making Your Blog Look Professional
You don’t need to be a designer to make your blog look good. Here’s how to handle images and basic branding:
Where to Find Free Images
- Unsplash – High-quality, completely free
- Pexels – Great variety, all free
- Pixabay – Huge library, free
- Freepik – Free with attribution (or pay for no attribution)
Download images, customize them if you want (add text overlays in Canva), and upload to your blog.
Create a Simple Logo
You don’t need to hire a designer. Use Canva (free) to make a simple logo in 10 minutes:
- Go to Canva.com
- Search “logo”
- Pick a template
- Change the text to your blog name
- Download and upload to your site
Keep Your Branding Consistent
Pick 2-3 colors and 1-2 fonts and stick with them. This makes your blog look professional and cohesive.
Example:
- Primary color: Blue (
#2563EB) - Secondary color: Yellow (
#FBBF24) - Font: Poppins for headings, Open Sans for body text
Use these everywhere – your logo, graphics, featured images, social media.
Optimize Your Images for Speed
Big images = slow site = bad SEO. Always optimize images before uploading:
Option 1: Use a free tool like TinyPNG to compress images before upload Option 2: Install an image optimization plugin like ShortPixel or Smush (they auto-compress as you upload)
Pro tip: Aim for featured images under 200KB and in-post images under 100KB.
“Need help with design, writing, and SEO? Check out my list of the 7 best AI tools for bloggers to speed up your workflow.”
Step 11: Speed Up Your Site (This Matters for SEO)
Site speed is a ranking factor. Slow sites rank lower and lose visitors. Fast sites win.
Here’s how to make your blog fast:
1. Use a caching plugin
Caching stores a static version of your pages so they load instantly for visitors.
Best options:
- WP Rocket ($59/year) – Easiest, most powerful
- LiteSpeed Cache (free) – Great if your host uses LiteSpeed servers
- W3 Total Cache (free) – More technical but effective
Pick one, install it, turn on basic caching. Don’t overthink the settings.
2. Use a CDN (Content Delivery Network)
A CDN stores copies of your site on servers around the world, so visitors load your site from the server closest to them.
Free options:
- Cloudflare – Free plan is great for beginners
- Many hosts include CDN (check if yours does)
3. Compress images (covered in Step 10)
Big images are the #1 reason blogs are slow. Use ShortPixel or Smush.
4. Use a lightweight theme
Heavy themes with tons of features slow you down. Stick with lightweight themes like Blocksy, Astra, or Kadence.
5. Limit your plugins
Only install plugins you actually need. Every plugin adds code. More code = slower site.
Aim for under 15 plugins total.
6. Test your speed regularly
Use these free tools:
- Google PageSpeed Insights – Shows mobile and desktop scores
- GTmetrix – Detailed breakdown of what’s slowing you down
Target: Aim for a score above 80 on mobile. Above 90 is great.
Most important tip? Choose good hosting from the start. A cheap, slow host will make optimization way harder. This is why I recommend starting with at least decent shared hosting (Hostinger) or managed hosting (WP Engine) if you can afford it.
Step 12: Lock Down Your Site (Security Basics)
Small blogs DO get hacked. I’m not trying to scare you, but it happens more than you’d think. Bots scan the internet looking for vulnerable WordPress sites to exploit.
The good news? Basic security is simple and takes 10 minutes to set up.
1. Use strong, unique passwords
“Blogname123” is not a password. Use a password manager like LastPass or 1Password to generate random passwords like “kR9#mP2$vX8@qL5” for your:
- WordPress admin login
- Hosting account
- Database
2. Limit login attempts
Bots try to guess your password thousands of times. Install a plugin that locks them out after a few failed attempts.
Your security plugin (Wordfence or Sucuri) handles this automatically.
3. Install a security plugin
Pick one:
- Wordfence (free version is solid)
- Sucuri (more advanced)
These plugins:
- Block suspicious IPs
- Scan for malware
- Monitor file changes
- Add a firewall
Install it, run a scan, turn on the firewall. Done.
4. Keep everything updated
Outdated WordPress, themes, or plugins = security holes hackers exploit.
Easy fix: When you see update notifications in your dashboard, click “Update.” Takes 30 seconds.
Most managed hosts auto-update WordPress core for you. Check if yours does.
5. Back up your site regularly
If your site gets hacked or breaks, backups let you restore it in minutes instead of rebuilding from scratch.
Use UpdraftPlus (free):
- Install the plugin
- Connect it to Google Drive or Dropbox
- Set automatic backups (weekly is fine for new blogs)
Pro tip: Some hosts (like WP Engine or Kinsta) include automatic daily backups. Check if yours does so you’re not backing up twice.
One more thing: Make sure your site has an SSL certificate (the padlock in the browser). Most hosts provide this free – just turn it on in your hosting dashboard.
Don’t skip security. Read my full WordPress security plugins comparison to choose the right protection for your blog.

Step 13: Launch Your Blog (Don't Skip This Checklist)
You’re almost there! But don’t announce your blog to the world when you only have 2 posts and no about page. That looks unprofessional.
Here’s your pre-launch checklist:
Content Ready?
- ☐ 8-12 blog posts published (gives visitors something to read)
- ☐ About page (who you are, why you started this blog)
- ☐ Contact page (with a working contact form)
- ☐ Privacy Policy page (required if you collect emails or use ads)
- ☐ Affiliate Disclosure page (if you’re using affiliate links)
Technical Setup?
- ☐ SEO plugin installed and configured (Rank Math or Yoast)
- ☐ Security plugin active (Wordfence)
- ☐ Backup plugin scheduled (UpdraftPlus)
- ☐ Caching plugin working (WP Rocket or LiteSpeed)
- ☐ Google Analytics installed (track your traffic)
- ☐ Google Search Console set up (see how you rank)
- ☐ Sitemap submitted to Google Search Console
Design & Branding?
- ☐ Logo uploaded
- ☐ Site title and tagline set
- ☐ Theme customized (colors, fonts)
- ☐ Navigation menu created
- ☐ Site tested on mobile (most traffic comes from mobile)
How to Set Up Google Analytics & Search Console:
Google Analytics:
- Go to analytics.google.com
- Create an account and property
- Copy your tracking code
- Install “Site Kit by Google” plugin on WordPress
- Connect your Analytics account
Google Search Console:
- Go to search.google.com/search-console
- Add your site
- Verify ownership (Site Kit plugin makes this easy)
- Submit your sitemap (usually at yourdomain.com/sitemap.xml)
Launch Day
Once everything’s checked off:
- Announce on social media (if you have followers there)
- Email your friends and ask them to check it out
- Post in relevant communities (Reddit, Facebook groups – but don’t spam)
- Share in your email signature
Don’t expect thousands of visitors on day one. That’s normal. Building traffic takes time.
Step 14: Grow Your Traffic (Free and Paid Methods)
You’ve launched. Now comes the real work – getting people to actually visit your blog.
Free Traffic Strategies (Start Here)
1. SEO (Search Engine Optimization)
This is the big one. SEO = free traffic from Google that keeps coming month after month.
What to do:
- Write helpful, in-depth posts (1500+ words)
- Target long-tail keywords (use the research from Step 9)
- Optimize every post (follow Step 8)
- Build internal links between your posts
- Get backlinks from other sites (guest posting, being quoted, etc.)
Timeline: Takes 3-6 months to start seeing results. But once you rank, traffic is passive.
2. Pinterest
If your niche is visual (recipes, DIY, home decor, fashion, travel), Pinterest is gold.
What to do:
- Create vertical pin graphics (1000x1500px) in Canva
- Pin every blog post (multiple pins per post)
- Join group boards in your niche
- Use Tailwind to schedule pins
Timeline: Can see traffic in weeks if you’re consistent.
3. Social Media
Pick ONE platform where your audience hangs out:
- Instagram: Lifestyle, fashion, travel, fitness
- Twitter/X: Tech, news, business, writing
- Facebook: Parenting, local topics, older demographics
- TikTok: Entertainment, how-tos, younger audience
What to do:
- Share your posts (but not JUST your posts – engage genuinely)
- Provide value in your posts and stories
- Build relationships, not just followers
Timeline: Varies wildly. Can be fast or slow.
4. Email List
Start building an email list from day one. It’s the only traffic you actually own (social platforms can ban you, Google can change algorithms).
What to do:
- Offer a freebie (checklist, template, mini-guide) in exchange for emails
- Use an email tool (ConvertKit, Mailchimp, or MailerLite – all have free plans)
- Email your list weekly with your new posts + value
Timeline: Builds slowly but compounds over time.
5. Guest Posting
Write articles for other blogs in your niche. You get a backlink (helps SEO) and exposure to their audience.
What to do:
- Find blogs in your niche that accept guest posts
- Pitch them a topic their audience would love
- Write a killer post with a link back to your site
Timeline: Immediate traffic spike + long-term SEO boost.
Paid Traffic Options (Use Later)
Don’t spend money on ads when you’re brand new. Wait until you have:
- An email list to retarget visitors
- A product or offer to sell (so the ad pays for itself)
- Proven content that converts
When you’re ready:
Pinterest Ads – $5-10/day, great for driving blog traffic Facebook/Instagram Ads – $10-20/day, good for selling products Google Ads – Can be expensive, best for high-intent keywords
My advice: Focus on free traffic for your first 6-12 months. Master SEO and one social platform. Ads come later.

Step 15: Make Money from Your Blog (Monetization Strategies)
Let’s talk money. Here are the main ways blogs earn in 2026:
1. Affiliate Marketing ⭐ (Start Here)
You recommend products you use and love. When someone buys through your link, you earn a commission (usually 5-50%).
How it works:
- Sign up for affiliate programs (Amazon Associates, ShareASale, CJ Affiliate)
- Get your unique affiliate link
- Add it to your blog posts naturally (in reviews, tutorials, roundups)
- Always disclose “This post contains affiliate links”
Example: If you write “Best WordPress Hosting for Beginners” and link to Hostinger with your affiliate link, you earn $50-100 per sale.
Best for: Product reviews, tutorials, “best of” lists, tool comparisons
Timeline: Can start earning within first 1-3 months
Realistic income: $100-500/month in first 6 months, $1K-5K/month after a year (with consistent work)
2. Display Ads (Passive Income)
Ads show on your site automatically. You earn money based on views and clicks.
Ad Networks:
- Google AdSense – Easy to join, but pays least ($5-15 per 1000 visitors)
- Mediavine – Requires 50K sessions/month, pays $15-25 per 1000 visitors
- Raptive (formerly AdThrive) – Requires 100K sessions/month, pays $20-30+ per 1000 visitors
Best for: High-traffic blogs (news, entertainment, recipes)
Timeline: Can join AdSense immediately; premium networks take 6-12 months to qualify for
Realistic income: $200-500/month at 25K visitors, $2K-5K/month at 100K visitors
Downside: Ads slow down your site and can annoy readers. I’d wait until you’re making consistent affiliate income before adding ads.
3. Digital Products: (Highest Profit Margin)
Create and sell your own products: ebooks, templates, courses, printables, and checklists.
Examples:
- “Complete Blogging Toolkit” – $27
- “SEO Checklist for Bloggers” – $9
- “Email Course: Start Your Blog in 7 Days” – $49
Best for: Teaching, solving specific problems, templates
Timeline: Takes time to create but can earn within 3-6 months
Realistic income: $500-2K/month once you have an engaged audience
Pro: You create it once, sell it forever. 100% profit margin (minus payment processing fees).
4. Sponsored Posts:
Brands pay you to write about their product or service.
How it works:
- Brands reach out (or you pitch them)
- They pay you $100-$5000+ per post (depending on your traffic and niche)
- You write an honest review or tutorial featuring their product
Best for: Established blogs with steady traffic and engaged audience
Timeline: Usually takes 6-12 months before brands reach out
Realistic income: $500-2K/month once you’re established.
5. Services:
Offer your skills: coaching, consulting, freelance writing, design, etc.
Examples:
- “Blog Setup Service” – $500
- “1-on-1 SEO Coaching” – $100/hour
- “Custom WordPress Theme Design” – $1500
Best for: Experts in a specific skill
Timeline: Can start immediately if you have the skills
Realistic income: $1K-10K/month depending on rates and demand
6. Memberships & Paid Newsletters:
Charge a monthly fee for exclusive content, community, or resources.
Platforms: Patreon, Substack, MemberPress
Best for: Creators with loyal, engaged audiences
Timeline: Needs an established audience first (6-12 months)
Realistic income: $500-5K/month with 100-500 paying members
What I Recommend for Beginners:
Months 1-3: Focus on affiliate marketing
- Easiest to start
- No product creation needed
- Can earn while building
Months 4-6: Add a small digital product
- Ebook, template, or checklist
- Builds your brand as an expert
- Higher profit margin than affiliates
Months 6-12: Consider display ads OR sponsored posts
- Only if traffic is growing
- Don’t slow down your site with ads too early
The Income Plug strategy: I’m focusing on affiliate marketing first (promoting tools I actually use), then launching digital products (blogging templates and checklists). Ads come later.
FINAL THOUGHTS
You’ve made it through all 15 steps. Here’s what happens next:
- Week 1: Set up hosting, install WordPress, pick a theme
- Week 2-4: Write your first 8-12 posts
- Week 5: Launch and start promoting
- Months 2-6: Keep posting 2-3x per week, focus on SEO
- Months 6-12: Start seeing traffic and income
The truth? Most blogs fail because people quit after 2-3 months. They don’t see instant results and give up.
But if you stick with it, post consistently, focus on SEO, and provide real value, you WILL see results. It just takes time.
I’ve failed multiple times. This time, I’m committed. If you’re reading this, I hope you are too.
Let’s build something that lasts.
NOW WHAT?
Your blog is live. You know the steps. The only thing left is to actually do it.
Start with Step 1. Pick your niche. Buy your domain. Take action today, not “someday.”
And if you want to follow along on my journey building The Income Plug, bookmark this blog and come back. I’ll be documenting everything. the wins, the failures, and the lessons.
Let’s do this. 💪
Step 16: Use Affiliate Links the Right Way (Stay Legal and Build Trust)
If you’re going to make money with affiliate links (and you should – it’s one of the easiest ways to monetize), you need to do it properly.
Disclosure is Required (and Builds Trust)
The FTC requires you to disclose affiliate relationships. But beyond legal requirements, being transparent builds trust with your readers.
Create an Affiliate Disclosure Page:
Go to Pages → Add New in WordPress and create a page titled “Affiliate Disclosure” or “Disclosure.”
Simple template you can use:
“This site contains affiliate links, which means I may earn a commission if you click on a link and make a purchase. This comes at no extra cost to you. I only recommend products and services I personally use or genuinely believe will add value to my readers. Your support helps keep this blog running – thank you!”
Add this page to your footer menu so it’s always accessible.
Add Disclosure to Posts with Affiliate Links:
At the top or bottom of any post containing affiliate links, add a short note:
“This post contains affiliate links. If you make a purchase through these links, I may earn a commission at no extra cost to you. I only recommend products I actually use or believe in.“
Keep It Real
Here’s the thing – readers aren’t stupid. They know you’re trying to make money. That’s fine. What they don’t like is dishonest recommendations.
DON’T: Recommend garbage products just because they pay high commissions
DO: Only promote things you’ve actually used or thoroughly researched
DON’T: Write fake “best of” lists based on who pays the most
DO: Give honest pros and cons, even for products you’re promoting
Your reputation is more valuable than any single commission.
How to Add Affiliate Links:
When you join an affiliate program (like Hostinger, Amazon Associates, ShareASale), they’ll give you a unique tracking link that looks like:
https://www.hostinger.com/?REFERRALCODE=YOURNAME
Don’t just paste that ugly link everywhere. Make it clean:
- Shorten it with Pretty Links plugin or your affiliate program’s link shortener
- Use natural anchor text: “I use Hostinger for my hosting” (linked)
- Place it contextually where it makes sense
Track Your Affiliate Performance:
Most affiliate programs have dashboards showing:
- How many clicks you got
- How many sales you made
- How much you earned
Check this monthly. Double down on what’s working.
Step 17: Build Your Email List from Day One (This is Your Real Asset)
Social media platforms can ban you. Google can change their algorithm. But your email list? That’s yours forever.
Why Email Matters:
- You own the list (no platform can take it away)
- Higher engagement than social media (20-30% open rates vs 2-3% reach on Instagram)
- Direct line to your audience
- Easiest way to sell products and promote new posts
Start collecting emails from day one, even if you only have 10 subscribers.
Pick an Email Marketing Tool:
Free/Cheap Options:
- Systeme.io – Free up to 2,000 contacts (my top pick for beginners)
- Omnisend – Free up to 250 contacts (great for ecommerce and has SMS features)
- ConvertKit – Free up to 1,000 subscribers, great for creators
- Mailchimp – Free up to 500 subscribers (but limited features)
- MailerLite – Free up to 1,000 subscribers
All of these let you:
- Create signup forms
- Send automated welcome emails
- Send newsletters
Pick one and sign up. Takes 5 minutes.
Create a Lead Magnet (Free Gift)
People need a reason to give you their email. Offer something valuable in exchange.
Lead magnet ideas:
- “Blog Launch Checklist” (PDF)
- “SEO Cheat Sheet for New Bloggers” (PDF)
- “10 Blog Post Templates You Can Fill In” (Google Doc)
- “Email Course: Start Your Blog in 7 Days” (Email series)
- “[Your Niche] Resource Library” (Collection of links/tools)
Make it:
- Simple to create (you’re not writing a book)
- Immediately useful
- Related to your blog topic
Create it in Google Docs or Canva, export as PDF, upload to your email tool.
Add Signup Forms to Your Blog:
Place opt-in forms in these spots:
- End of blog posts – “Want more blogging tips? Get my free checklist!”
- Sidebar – Always visible as people read
- Footer – One more chance before they leave
- Pop-up – Use sparingly (exit-intent or after 30 seconds)
Most email tools give you embed codes for forms. Copy, paste into WordPress widgets or use their plugin.
Send Regular Emails
Don’t just collect emails and never send anything. That’s pointless.
Email your list:
- Weekly with your new blog post + a personal note
- Monthly with your best content roundup
- When you launch a product
- When you have something genuinely valuable to share
Keep it casual. Write like you’re emailing a friend, not a corporate newsletter.
Your email list will become your most valuable asset. Treat it well.

Step 18: Track What's Working (Analytics Setup)
You can’t improve what you don’t measure. Analytics show you what’s working so you can do more of it.
Set Up Google Analytics:
I covered this briefly in Step 13, but here’s the detailed version:
- Go to analytics.google.com
- Click “Start measuring”
- Create an account (name it whatever you want)
- Create a property (your blog name)
- Choose “Web” and enter your URL
- Get your tracking code
Install on WordPress:
- Install “Site Kit by Google” plugin (easiest method)
- Or manually paste tracking code in your theme’s header
What to Track:
Log in weekly and check:
Pageviews – How many times your posts were viewed
- Goal: Steady growth month-over-month
Top Posts – Which posts get the most traffic
- Strategy: Write more content similar to your top posts
Traffic Sources – Where visitors come from
- Organic search (Google)
- Direct (typed your URL)
- Social (Facebook, Pinterest, etc.)
- Referral (links from other sites)
Bounce Rate – % of people who leave without clicking anything
- Under 60% is good
- Over 80% means something’s wrong (slow site, bad content, misleading title)
Average Session Duration – How long people stay
- 1-2 minutes = decent
- 3+ minutes = great engagement
Set Up Google Search Console:
This shows how you’re ranking in Google.
- Go to search.google.com/search-console
- Add your site
- Verify ownership (Site Kit plugin makes this automatic)
- Submit your sitemap (usually yourdomain.com/sitemap.xml)
What to Check:
Search Queries – What keywords you’re ranking for
- Find surprise winners and write more content around them
Impressions vs Clicks – How often you show up vs how often people click
- Low clicks = your titles need work
Average Position – Where you rank for keywords
- Anything on page 1 (positions 1-10) is great
- Positions 11-20? You’re close; optimize that post
Use Data to Make Decisions:
- Post about WordPress getting 80% of your traffic? Write more WordPress content.
- Email list growing from a specific lead magnet? Create similar freebies.
- One post converting affiliate sales? Update it, promote it, and link to it more.
Don’t just collect data. Act on it.
Step 19: Don't Make These Beginner Mistakes (Learn from My Failures)
I’ve made every mistake in the book. Here’s what NOT to do:
Mistake #1: Trying to Do Everything at Once
I’ve been there. “I need Pinterest AND Instagram AND TikTok AND YouTube AND email marketing AND Facebook groups AND…”
No. You’ll burn out in two weeks.
But here’s the thing: SEO and Pinterest work beautifully together, and you should start both from day one.
Why SEO + Pinterest is the winning combo:
- ✅ They complement each other – SEO is long-term (3-6 months to rank), and Pinterest can drive traffic in weeks.
- ✅ Both are evergreen – Your content keeps working for you months/years later.
- ✅ Not time-intensive together – You’re already writing blog posts for SEO. Pinterest just means creating a few pins for those same posts.
- ✅ Pinterest loves blog content – Every pin links back to your blog.
- ✅ You’re not creating twice the content. It’s the same post, just repurposed visually
Here’s what your workflow looks like:
- Monday: Write and publish a blog post (optimized for SEO)
- Tuesday: Create 3-5 Pinterest pins for that post in Canva (takes 30-60 minutes)
- Wednesday-Sunday: Schedule those pins and engage on Pinterest for 15-20 minutes/day
You’re not blogging every single day anyway. Use that time for Pinterest.
Fix: Start with SEO + Pinterest. Master these two. Skip Instagram, TikTok, YouTube, and Twitter for your first 6-12 months. Those platforms require daily content creation and will drain your energy away from blogging.
The perfect beginner traffic strategy:
- SEO – Write 2-3 optimized blog posts per week
- Pinterest – Create pins for every post, schedule them with Tailwind or Pinterest’s scheduler
- Email list – Capture visitors from both channels
That’s it. Two channels. Both feeding your blog. Both evergreen. Both are manageable.
Once you’re consistently getting 10K+ monthly visitors from SEO + Pinterest, THEN consider adding another platform if you want.
Mistake #2: Changing Your Niche Every Month
“Maybe I should write about travel… wait, no, productivity… actually, crypto looks hot…”
Switching niches kills momentum. Google rewards consistency and expertise.
Fix: Pick a niche, commit for at least 6 months, and give it a real chance.
Mistake #3: Plugin Overload
“Oh, this plugin looks cool. And this one. And this one…”
Every plugin adds code. More code = slower site = worse SEO.
Fix: Only install plugins you actually need. Aim for under 15 total. Delete unused plugins.
Mistake #4: Ignoring Mobile
60-70% of your traffic will come from mobile devices. If your site looks broken on phones, you’re toast.
Fix: Test every page on your phone before publishing. Use responsive themes (like Blocksy, Astra).
Mistake #5: Not Building an Email List
I let two blogs die without collecting a single email. When I quit, I had zero way to bring those readers back.
Fix: Add an email signup form on DAY ONE. Even if your first subscriber is your mom.
Mistake #6: Giving Up Too Soon
This is the killer. Most blogs fail because people quit after 2-3 months when they’re not making $5K/month yet.
SEO takes 6-12 months. Building an audience takes time. Creating quality content takes effort.
Fix: Commit to 1 year minimum. Post consistently. Trust the process.
Mistake #7: Writing for Google Instead of Humans
“I need to hit 2000 words and use my keyword 47 times!”
Google is smart enough to spot keyword stuffing. Write for humans. Optimize for SEO second.
Fix: Write helpful content people actually want to read. Then add SEO optimization.
Mistake #8: Not Investing in Yourself
Cheap hosting, free everything, refusing to spend $10 on a tool that could save you 10 hours.
I get it – you’re bootstrapping. But sometimes spending $50 on good hosting or $12 on a keyword tool is the smartest investment.
Fix: Invest strategically. Good hosting, one premium plugin, and maybe a keyword tool. That’s it for year one.
FINAL WORDS: You've Got Everything You Need
You now have the complete roadmap:
- How to set up WordPress
- How to write content that ranks
- How to grow traffic
- How to make money
The only thing standing between you and a successful blog is action.
Not “someday.” Not “when I have more time.” Not “after I research more.”
Today.
Pick your niche. Buy your domain. Install WordPress. Write your first post.
I’ve failed multiple times because I overthought everything. This time, I’m just doing it. Imperfect action beats perfect planning every single time.
If you’re building a blog too, I’m rooting for you. Bookmark The Income Plug and come back – I’ll be sharing what’s working (and what’s not) as I build this.
Let’s make 2026 the year we actually do this.
Now go. Build something. 💪
Your 30-Day Blog Launch Plan (What to Do Each Week)
Feeling overwhelmed? Don’t be. Here’s exactly what to do in your first month to go from zero to a launched blog.
Week 1: Foundation
Day 1-2:
- Pick your niche (the topic you’ll focus on)
- Choose and buy your domain name
- Sign up for hosting
Day 3-4:
- Install WordPress (one-click install from your host)
- Pick and activate a theme (Blocksy, Astra, or Kadence)
- Customize basic colors and fonts
Day 5-7:
- Install essential plugins (SEO, security, backup, caching)
- Write your About page
- Create your Contact page
- Set up Privacy Policy and Affiliate Disclosure pages
End of Week 1: Your blog structure is ready. Time to create content.
Week 2: Content Creation
Day 8-14:
- Write and publish 4 blog posts (aim for 1 post every 2 days)
- Sign up for an email marketing tool (Systeme.io or ConvertKit)
- Create a simple lead magnet (checklist or template)
- Add email signup forms to your site
- Install Google Analytics
End of Week 2: You have 4 published posts and a way to capture emails. Progress!
Week 3: Visibility
Day 15-21:
- Create social media profiles (Pinterest + one other platform if you want)
- Write and publish 2 more posts (total: 6 posts)
- Create Pinterest pins for all 6 posts
- Share your posts on social media
- Set up Pinterest business account and start pinning
End of Week 3: Your content is out there and starting to get discovered.
Week 4: Optimization & Monetization
Day 22-28:
- Write and publish 2 more posts (total: 8 posts)
- Add affiliate links to relevant posts where they make sense
- Submit your sitemap to Google Search Console
- Test your site speed with PageSpeed Insights
- Optimize/compress any large images
- Double-check all pages work on mobile
Day 29-30:
- Review everything one last time
- Announce your blog (email friends, post on social media)
- Celebrate! You did it! 🎉
End of Week 4: You have a live blog with 8 solid posts, email capture, and basic monetization in place.
How to Scale After 3-6 Months (What Comes Next)
You’ve been posting consistently for 3-6 months. Your traffic is growing. Maybe you’ve made your first $50-100. Here’s how to level up:
Content:
- Increase to 3-4 posts per week if you can maintain quality
- Update your top-performing posts with fresh info
- Create content clusters (write 5-10 posts all about one subtopic, heavily interlinked)
Outsource:
- Hire a VA (virtual assistant) to create Pinterest pins ($5-10 per hour on Fiverr)
- Get help with image editing or formatting
- This frees you up to focus on writing and strategy
Products:
- Create your first digital product (ebook, template pack, mini-course)
- Price it $9-49 to start
- Promote it to your email list and in relevant blog posts
Monetization:
- Apply to premium ad networks if you hit their requirements:
- Mediavine: 50,000 sessions/month
- Raptive: 100,000 sessions/month
- Increase affiliate partnerships (reach out to brands you love)
- Start pitching for sponsored posts
Double Down:
- Check Google Analytics – which posts get the most traffic?
- Write more content on those topics
- Update and expand your winner posts (turn 1500-word posts into 3000-word ultimate guides)
- Product reviews and comprehensive guides typically earn the most
The key: Don’t add new strategies. Get better at what’s already working.

Blog Post Template (Use This for Every Article)
Copy this structure for consistent, SEO-friendly posts:
1. Headline (H1)
- Include your target keyword
- Make it compelling
- Keep it under 60 characters
2. Introduction (2-3 paragraphs)
- Hook them with a problem or question
- Promise what they’ll learn
- Include keyword in first 100 words
3. Quick Overview (H2) – Optional
- Bulleted list of what the post covers
- Helps readers scan and decide to keep reading
4. Main Content (Multiple H2s)
- Break content into clear sections
- Use H3s for subsections
- Keep paragraphs short (2-4 sentences)
- Add images, screenshots, or examples
5. FAQ Section (H2)
- Answer 3-5 common questions
- Great for ranking in “People Also Ask”
- Use H3 for each question
6. Conclusion (H2)
- Summarize key points
- Reinforce main takeaway
7. Call to Action
- Ask a question to encourage comments
- Offer your lead magnet
- Link to a related post or product
Internal Links: Add 2-3 links to other posts on your blog throughout the content
External Links: Add 1-2 links to authority sites (Wikipedia, official docs, studies)
This template works. Use it every time and you’ll never stare at a blank page wondering how to structure your post.
Pre-Launch Checklist (Are You Ready to Go Live?)
Before you announce your blog to the world, make sure you’ve checked every box:
Technical Setup:
- ☐ Domain and hosting are active
- ☐ WordPress is installed and updated
- ☐ Theme is installed and customized
- ☐ Logo is uploaded
- ☐ SSL certificate is active (site shows HTTPS)
- ☐ Permalinks set to “Post name”
Plugins Installed:
- ☐ SEO plugin (Rank Math or Yoast)
- ☐ Caching plugin (WP Rocket or LiteSpeed)
- ☐ Security plugin (Wordfence)
- ☐ Backup plugin (UpdraftPlus)
- ☐ Image optimization (ShortPixel or Smush)
- ☐ Contact form (WPForms)
Content Ready:
- ☐ 8-12 blog posts published
- ☐ About page written
- ☐ Contact page with working form
- ☐ Privacy Policy page
- ☐ Affiliate Disclosure page (if using affiliate links)
Analytics & Tools:
- ☐ Google Analytics installed and tracking
- ☐ Google Search Console set up
- ☐ Sitemap submitted to Search Console
- ☐ Email marketing tool connected
- ☐ Lead magnet created
- ☐ Email opt-in forms added
Social & Promotion:
- ☐ Pinterest business account created
- ☐ At least 10 pins created for your posts
- ☐ Social media profiles set up (optional)
Mobile & Speed:
- ☐ Site tested on mobile (looks good on phone)
- ☐ Site speed tested (score above 70)
- ☐ All images compressed
If you checked every box, you’re ready to launch! 🚀
Quick FAQ
Q: How much does it really cost to start a blog?
Bare minimum: $50-100 for the first year
- Domain: $10-20/year
- Shared hosting: $3-5/month ($36-60/year)
- Free theme and free plugins
Recommended: $150-200 for the first year
- Domain: $10-20/year
- Better hosting: $10-15/month ($120-180/year)
- WP Rocket: $59/year (optional but worth it)
You can start cheap and upgrade as you earn.
Q: How long until I see traffic?
Honest answer: It varies, but here’s what’s typical:
- First month: 10-100 visitors (mostly friends and family)
- Months 2-3: 100-500 visitors (if you’re posting consistently and using Pinterest)
- Months 3-6: 500-2,000 visitors (as your posts start ranking on Google)
- Months 6-12: 2,000-10,000+ visitors (if you’ve been consistent)
Pinterest can bring traffic in weeks. SEO takes 3-6 months. That’s why you do both.
Some posts will surprise you and rank fast. Others take longer. Keep posting.
Q: Can I start a blog without knowing how to code?
Yes. 100%.
WordPress handles everything. Themes control the design. Plugins add features. Page builders (Gutenberg or Elementor) let you drag and drop.
I don’t know how to code. Most successful bloggers don’t. You don’t need to.
Q: Should I use free hosting?
No.
Free hosting is:
- Slow (kills your SEO)
- Unreliable (your site goes down)
- Limited (can’t install plugins you need)
- Often plastered with their ads
Spend the $3-5/month on real hosting. It’s the foundation of your blog. Don’t cheap out here.
Q: How long should my blog posts be?
Aim for 1,500-2,500 words for pillar posts.
But quality > length. A 1,000-word post that perfectly answers a question beats a 3,000-word post with fluff.
Longer posts (2,000+ words) tend to rank better on Google, but only if they’re actually helpful.
Q: Do I need social media to succeed?
No, but Pinterest helps.
I recommend:
- SEO (required – this is your main traffic source)
- Pinterest (highly recommended – works great with blogs)
- Email list (required – your most valuable asset)
- Everything else (optional – add later if you want)
You don’t need Instagram, TikTok, YouTube, or Twitter to build a successful blog.
Final Words: Keep Going (This is Where Most People Quit)
Here’s the hard truth: Most blogs fail in the first 3 months.
Not because the bloggers lacked talent. Not because their niche was wrong. Not because blogging doesn’t work.
They quit too soon.
Month 1 is exciting. You’re setting everything up, writing posts, learning new stuff.
Month 2 gets harder. You’re still not seeing much traffic. You’ve run out of “easy” topic ideas.
Month 3 is where people break. “This isn’t working. Nobody’s reading. I’m wasting my time.”
But here’s what you don’t see: Your posts are being indexed by Google. They’re slowly climbing in rankings. Pinterest pins are being saved. Your foundation is being built.
Month 6 is where things start clicking. Traffic picks up. You make your first affiliate sale. Someone comments on a post. You realize it’s actually working.
Month 12 is where you look back and think “I’m so glad I didn’t quit.”
So here’s my advice:
✅ Help people first – Write content that genuinely solves problems. Money follows value.
✅ Be patient – Growth is steady, not instant. Trust the process.
✅ Stay consistent – 2-3 posts per week. Every week. For months. That’s the secret.
✅ Keep learning – Read about SEO. Test new topics. See what works for others.
✅ Back up your site – Before making big changes, run a backup. Save yourself from heartbreak.
✅ Replace placeholders – When you join affiliate programs, swap out [AFFILIATE_LINK] with your real links. And always disclose.
✅ Track what works – Check Analytics. Double down on what’s getting traffic.
✅ Enjoy the process – You’re building something. That’s pretty cool.
I’ve failed at blogging multiple times. The only difference this time? I’m not quitting at month 3.
If you’re building a blog too, I’m rooting for you. We’re in this together.
Now close this guide. Stop researching. Stop overthinking.
Go write your first post. ✍️